Yum Cakes and Decors
You can dance...you can sing...but you can make a delicious cake the easy way!

Wednesday, July 26, 2017

Royalty Cakes #CakesAndDecors


Ingredients:

3/4 c. butter, softened
1 1/4 c. sugar
8 egg yolks
2 1/2 c. sifted cake flour
1 tbsp. baking powder
1/2 tsp. salt
3/4 c. milk
1/2 tsp. lemon extract
Royalty Filling

Cream butter; gradually add sugar, beating well. Beat egg yolks until thick and lemon colored and add to creamed mixture. Beat well.
Combine dry ingredients; add to creamed mixture alternately with milk, beginning and ending with flour mixture. Stir in lemon extract.

Pour batter into 3 greased and floured 9 inch round cake pans. Bake at 350 degrees for 20-25 minutes or until a wooden pick inserted in center comes out clean. Cool in pans 10 minutes; remove layers from pans and let cool completely. Spread Lord Baltimore Filling between layers and on top of cake. Yield: One 3 layer cake.

Filling:

1 1/2 c. sugar
1 tbsp. light corn syrup
1/2 c. water
2 egg whites
1/4 tsp. orange juice
2 tsp. lemon juice
12 candied cherries, chopped
1/2 c. macaroon crumbs
1/2 c. almonds, chopped & toasted
1/2 c. pecans, chopped

Procedures:

(1) Combine sugar, syrup and water in a small saucepan; cook over low heat until mixture reaches soft ball stage (240 degrees).

(2) Beat egg whites (at room temperature) until soft peaks form. While beating at medium speed of electric mixer, slowly pour hot syrup mixture in a thin stream over egg whites. Beat 1 minute.

(3) Combine remaining ingredients; fold into filling. Yield: Enough for one 3 layer cake.


Friday, March 3, 2017

Banoffee Pie #CakesAndDecors


A creamy cold vanilla ice cream in the middle of a delicious warm tart that's amazing to all.


Ingredients:

150 g unsalted butter (cold) , plus extra for greasing
1 orange
200 g plain flour , plus extra for dusting
100 g ground almonds
6 large free-range eggs
1 x 500 g tub of good-quality vanilla ice cream
4 tablespoons dulce de leche , or caramel sauce
300 g caster sugar
2 large ripe bananas
1 lime
1 tablespoon Camp coffee syrup

Procedures:

(1) Preheat the oven to 180°C/350°F/gas 4. Lightly grease a deep, 25cm loose-bottomed tart tin.

(2) To make the pastry, finely grate the orange zest into a food processor, add the cold butter, the flour, almonds and 1 egg, then blitz until it comes together into a ball of dough, wrap in baking paper and chill for 30 minutes.

(3) Roll out on a clean flour-dusted surface until just under ½cm thick, then loosely roll up around the rolling pin and unroll over the tart tin, easing it in and pushing it carefully into the sides. Trim off any excess, patch up any holes, then prick the base with a fork, cover and chill in the fridge for 30 minutes (use any leftovers for mince pies). When the time’s up, line the pastry case with quality clingfilm (non- PVC), then fill with rice, making sure you pack it right out to the sides. Bake blind for 15 minutes, remove the clingfilm and rice and bake for another 5 minutes, or until lightly golden, then leave to cool. Soften your ice cream in the fridge.

(4) Once the pastry case is cool, spread the dulce de leche or caramel across the base, scoop over the ice cream and freeze until frozen solid – you could get it up to this stage a day in advance. Turn the oven up to 220°C/425°F/gas 7. To make your meringue topping, separate the remaining 5 eggs (keep the yolks for another day).

(5) In a free-standing mixer, whisk the egg whites with a pinch of sea salt until they form soft peaks. Place the sugar and 80ml of water in a pan on a high heat. Use a sugar thermometer to monitor it getting up to 110°C, then reduce the temperature to low. Let it gently bubble until it gets up to 120°C. Remove from the heat and let the bubbles settle for 30 seconds, then very gradually pour it into the egg whites, whisking constantly on a low speed. Leave it whisking for 10 minutes to cool and thicken the mixture. Meanwhile, peel and slice the bananas, finely grate over the lime zest and squeeze over the juice, then toss together.

(6) Get your tart out of the freezer, arrange the bananas over the ice cream, then pile on the meringue in nice peaks. Use a fork to ripple through drips of Camp coffee. Bake on the bottom of the oven for just 4 minutes, or until the meringue is lightly golden, leaving the ice cream frozen inside. Remove from the tin, and serve.


Sunday, May 22, 2016

Pineapple Sponge Cake #CakesAndDecors


Pineapple Sponge Cake #CakesAndDecors

Baking cake to surpass its flavor by way of adding ingredient like Fresh pineapple caramelized with golden syrup and butter, topped with light sponge, goes perfectly with rum and raisin. Make the ice cream a day ahead of making the cake for stress-free indulgence

Ingredients:

For the rum and raisin ice cream
115g raisins
115ml rum
400ml full-fat milk
8 free-range egg yolks
200g light soft brown sugar
400ml double cream

For the cake
175g golden syrup
325g butter, softened
1 x 1.5kg medium pineapple, peeled, cut into 7x8cm/2.5-3in diameter, 1cm thick cored rings, remainder reserved (about 175g/6oz)
275g caster sugar
5 free-range eggs
275g self-raising flour


Procedures:

(1) For the rum and raisin ice cream, heat the raisins and rum in a small saucepan until just warm.

(2) Remove from the heat and set aside for 15 minutes to allow the raisins to plump up.

(3) Place the milk into a saucepan and bring to the boil.

(4) Whisk the egg yolks and sugar in a bowl until combined.

(5) Whilst whisking continuously, slowly pour the boiling milk onto the egg yolks, then pour the mixture back into the saucepan.

(6) Stir in the cream, rum and raisins and cook the custard over a low heat, stirring continuously, for 4-5 minutes, or until the mixture has thickened. Do not let the mixture boil.

(7) Pour the custard into a bowl and set aside to cool completely. Transfer the custard to an ice cream machine to churn (according to manufacturer's instructions).

(8) Transfer to the freezer and freeze until needed.


For the cake, preheat the oven to 180C/350F/Gas 4.

(1) Line the sides and bottom of a 26cm/10in cake tin with greaseproof paper, making sure there is no gap for the syrup to leak through. Place onto a shallow baking sheet.

(2) Heat the golden syrup and 50g/2oz of the butter in a small saucepan over a low heat until melted. Pour into the bottom of the cake tin.

(3) Place the pineapple rings on top, pressing 6 around the outside and 1 in the centre.

(4) Finely chop the remaining pineapple and set aside.

(5) Beat the sugar and the remaining butter together in a bowl and until light and fluffy.

(6) Add the eggs, one at a time, beating well between each egg. Fold in the flour.

(7) Stir in the chopped pineapple until well combined.

(8) Spoon the cake mixture over the pineapple rings in the tin and tap to settle the mixture.

(9) Bake in the oven for 45-60 minutes, or until or until golden-brown on top and a skewer inserted into the middle comes out clean.

(10)Remove the cake from the oven and set aside to cool in the tin for 10 minutes.

(11) Invert the cake onto a large plate and peel off the greaseproof paper.

(12) Serve slices of the cake with a scoop of rum and raisin ice cream.


Cakes' Storage and Preparation #CakesAndDecors


Cakes' Storage and Preparation #CakesAndDecors

Storage:

Cakes are best stored in airtight tins rather than plastic boxes. Once a cake has been cut, the cut surfaces will start to dry.

Covering them with a piece of aluminium foil minimizes the effect. Undecorated cakes can be frozen for up to three months if tightly wrapped. It's also possible to freeze iced cakes: freeze them unwrapped just until the icing is firm (otherwise it will start to dry out) then carefully wrap the cake in clingfilm, plus an outer layer of aluminium foil. Remember to defrost the cake slowly in the refrigerator to prevent water beads or condensation forming on the surface.

Preparation:

It's essential to accurately weigh and measure cake ingredients and to follow the instructions carefully. The ingredients need to be at the correct temperature before you start. For example, many cake recipes specify soft, chilled or frozen butter, and eggs at room temperature, in order to achieve a specific effect. The shape and dimensions of a tin radically effect the cake's cooking time, so always use the tin size specified in the recipe. Even non-stick cake tins need greasing and lining.

Where caster sugar is specified, coarser granulated sugar or fine icing sugar are not acceptable substitutes as they'll create detrimental effects, such as a speckled finish or failure to hold air bubbles in the batter. Darker sugars such as unrefined molasses sugar or muscovado are great for baking but will give a darker color, deeper flavor and moister texture than caster sugar, so need to be used in their appropriate recipes.

Similarly, with flour, don't try to use strong bread flour in place of plain or self-raising flour because its gluten level is much higher. This will result in an uneven rise and a tough cake. You can, however, substitute plain flour for self-raising by adding sufficient raising agents.


Wednesday, November 25, 2015

Top Benefits of Ordering Cake Online #CakesAndDecors


Top Benefits of Ordering Cake Online #CakesAndDecors


Online shopping is being popular in every area. Consumers are buying various types of products and items online including buying speciality items like birthday cakes.

Are you planning to celebrate a special occasion like your child's birthday or your parents marriage anniversary within a few weeks? If yes, then you must be thinking of buying an exclusive cake also to make it a grand party! To order a beautiful and mouthwatering cake these days you have easier solutions than the traditional way.

Just browse the net and you will get so many reputed cake shops online who accept online cake orders. You can check various sites and check out varieties of cakes and place the order instantly by clicking your mouse. But if it is the first time you are going to buy cake online, you might be feeling a little confused about it. Should you go and get it by checking it physically or order it online where you actually can not see the product itself.
Here are few benefits of buying it online which may help you to take a decision:

Just like any other online shopping you can choose your birthday cake or any other cake in a relaxed mood as you do not need to rush to different shops to see the products.

Next, If you decide to buy a cake online you can order it even at the last moment, where as in case of buying it from a retail shop you need to choose the product and place the order in a right time before it gets too late.

By avoiding buying a cake from a retail cake shop in Kolkata, you can also avoid the crowd and the harassment of waiting in a queue. Most of the times in this traditional process of buying you hardly get the scope to check a large variety due to lack of time and space. But online shopping allows you to check a huge selection of cakes before you buy it.


The user friendly websites are easy to navigate and the process of checking the varieties is simple too. So if you want to buy birthday cakes online you can filter your search by the words birth day cakes and get the whole lot of product variations just by clicking your mouse. Thus, the fast and easy process of ordering saves lot of time.

If you order a cake online, you become free of tension and hazard of collecting and carrying it with special care so that it does not get damaged. The cake shops take the entire trouble to fetch it to your home with essential care just in time.

Buying cakes online has another advantage. By chance if you are away from your family due to some work or any other reason you can send the cake for the party through the cake shops online. No doubt, this will surely make your family glow in delight which will be equally satisfying for you too.


If you want to send a cake for your loved ones, while you place the order with the company you can also asked them to send a flower basket or a flower arrangement along with the cake which will carry an added pleasure. Usually most of the online cake shops have this service of sending flowers, souvenirs and chocolates with the cakes.


Therefore after going through this article, if you are now feeling confident about buying a cake online, start looking for a cake shop online and order one yummy cake to start the celebrations!


Saturday, September 12, 2015

Fruit-Filled Sponge Cake Recipe #CakesAndDecors


Fruit-Filled Sponge Cake Recipe #CakesAndDecors


Sponge Cake with Fruited Whipped Cream

Ingredients:

• 2/3 cups sifted flour
• 1/3 cup cornstarch
• 6 eggs, separated
• 2 tablespoons water
• 1 teaspoon vanilla
• 1 cup sugar
• 1/4 teaspoon salt
• 1/4 teaspoon cream of tartar
• Fruited Whipped Cream, below

Procedures:

1.) Sift together the flour and cornstarch. Beat egg yolks at high speed until thick and light lemon colored. Add water and vanilla.

2.) Continue beating and gradually add 1/2 cup of the sugar, 1 tablespoon at a time. Fold in flour and cornstarch mixture about 1/3 at a time until completely blended.

3.) Beat egg whites and salt until foamy; sift cream of tartar over the foamy whites then continue beating until soft peaks form. Gradually beat in remaining 1/2 cup sugar. Pour egg yolk batter over egg white mixture; fold together until there are no streaks. Pour into an ungreased 10-inch tube pan.

4.) Bake at 325° for 1 hour.

Fruited Whipped Cream

• 2 cups heavy cream

• 1/3 cup light corn syrup

• 2 cups seedless grapes

• 2 cups orange sections

1.) Beat cream until it begins to thicken. Gradually add corn syrup, beating until cream holds its shape. Fold in fruit.

2.) Pile onto cake or top individual servings with the cream mixture. If desired, sprinkle top with flaked or toasted coconut.


Cakes for Your Special Wedding #CakesAndDecors


Cakes for Your Special Wedding #CakesAndDecors


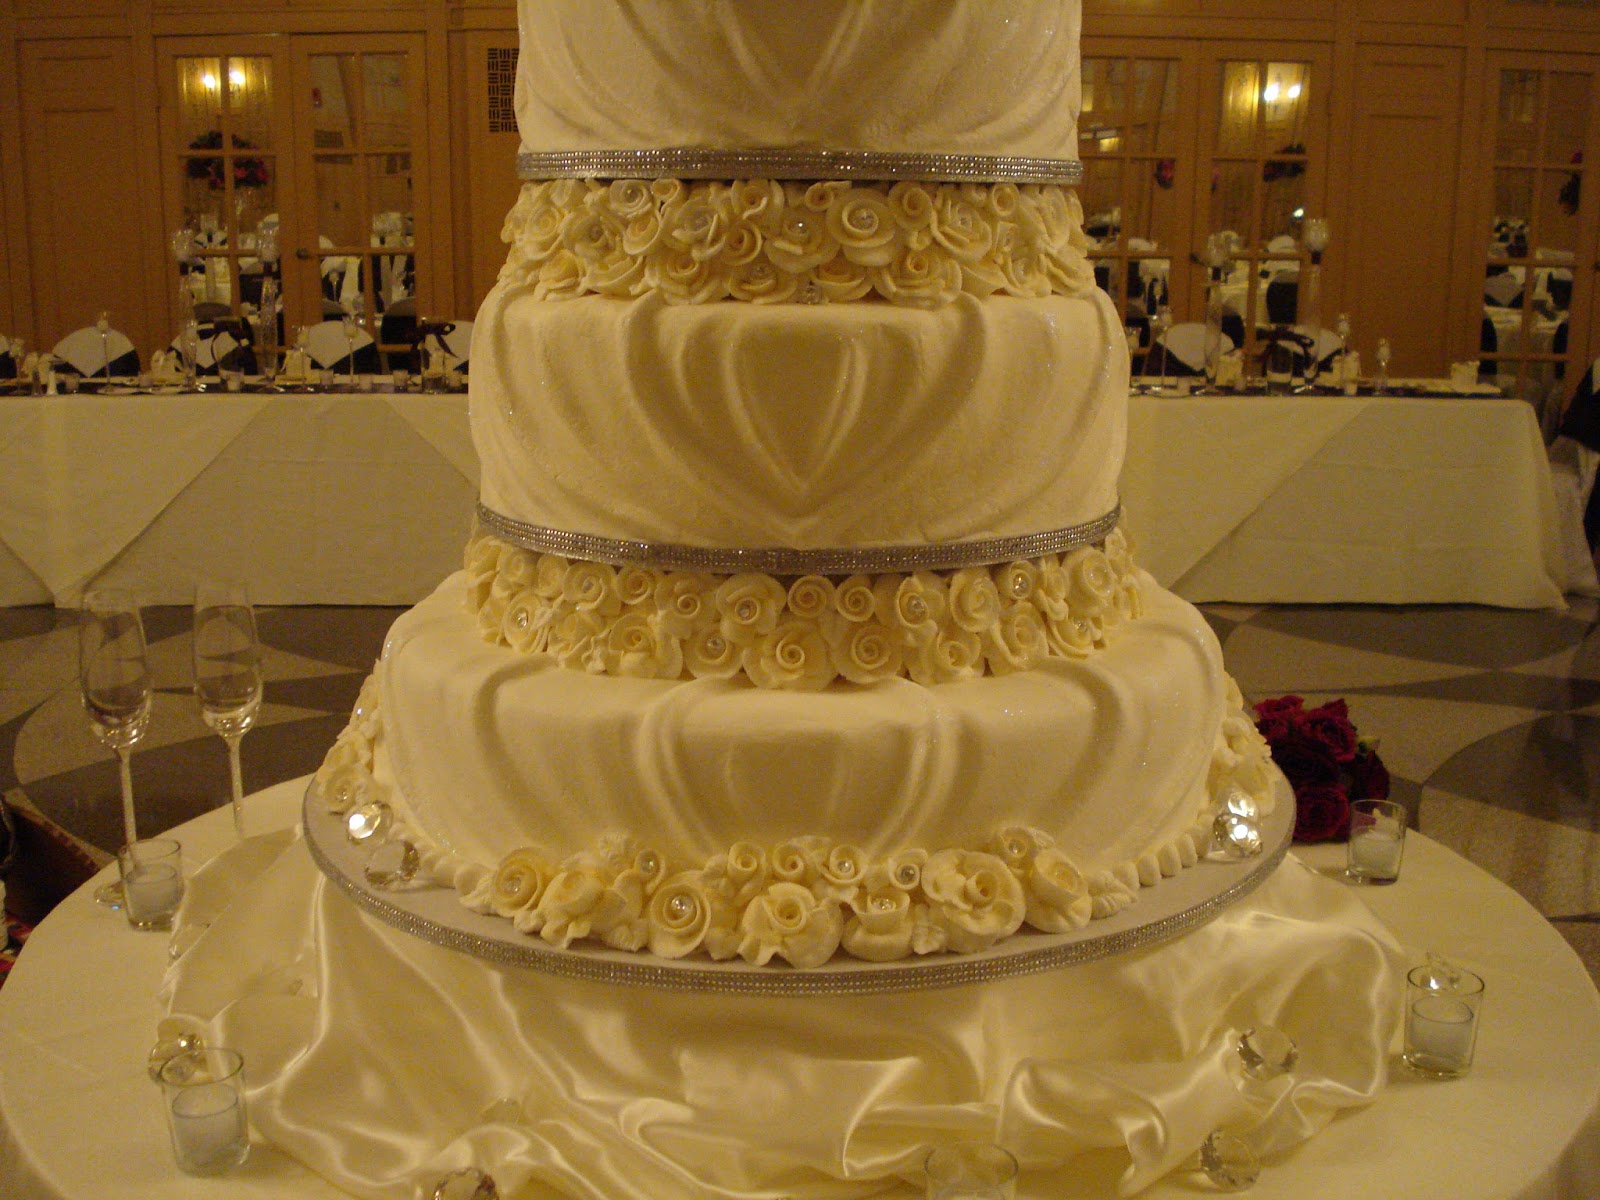
Your wedding day is one of the most exciting days of your life. You are making your commitment to another person public and openly declaring your love for one another. It is also a time when friends and family members gather to celebrate it with you: it is the best party of your life, and every party needs great food. The top priority for your love feast is the wedding cake. Too often wedding cakes are big on looks, but leave you wanting more in terms of taste. In a perfect world, wedding cakes would taste as great as they look. They would also be made handmade every time and made especially for each customer so it is a one-of-a-kind work of art. These sort of cakes do not have to only be for weddings, but other special occasions like birthdays, graduations, reunions, and so on.

The first question many people have about wedding cakes is cost and what they are getting for that cost. Cake price depends on the size, detail of the cake, and the kind of labor it requires, like if you want a lot of sugar flowers. If you have a lot of people at your event, you also should have a cake slab, undecorated, as well as the decorated cake so everyone can have cake. When you buy a cake, you should be paying for the following services: high quality, beauty craftsmanship, and personalization. High-quality cakes should be made with the best ingredients, no preservatives or mixes, only real butter and real chocolate. When you want a cake of this quality, bear in mind that the cake studios who make these cakes probably take limited orders so they can give each cake the time it deserves. The baker who makes your cake should also be extremely qualified and experienced. Expect beautiful extras like sugar flowers, expert piping, and so on. These are the touches that make your cake unique and special. A great cake studio will be able to hear your ideas and bring them to life.

What does the process of getting one of these cakes look like? For weddings especially, people usually want to do a cake tasting. At most boutiques, you schedule an appointment where you can taste from their most popular flavors and any others that you specifically request. If you have any ideas already, bring them with you to the consultation. This includes any stationary you have, fabrics, flowers, pictures of the dresses, and so on. These designs can provide inspiration to you and the cake designer so your tasty wedding cake fits beautifully into the overall atmosphere of your event. You should be aware of how long it takes to do a wedding cake and order as soon as possible. Making a wedding cake involves a lot of steps, like design, baking, filling, assembling, and putting on fondant. Decorative extras add to the time, and include hand-painting, design piping, and so on. An example of a cake that takes a long time is a Belgian Chocolate Tower, which uses tempered chocolate. Decorative extras also take a lot of time and include It takes several days to make a one-of-a-kind creation so be sure to order early in the planning process.

Wedding cakes should taste as good as they look. Too many cakes are designed to be beautiful, but taste-wise, are dry and bland. Some examples of fantastic cake flavors include almond, coconut, banana, chocolate, hazelnut, pistachio, white chocolate, and vanilla. Buttercreams like licorice, lemon, raspberry, coffee, and white chocolate take your cake to a whole new level, and styles like truffle ganaches and mudcakes satisfy even the most faithful lover of chocolate. Wedding cakes can be designed to serve small gatherings (15 people) or large ones that number in the hundreds. If you are having the cake be the center of the evening, you should factor in a large portion size with two different flavors. If you are having the event catered and serve cake after a three-course meal, people will likely not eat as much cake, so a smaller size is sufficient. One of the main cake distributor Sydney is Sweet passion.

A fantastic cake can transform your party into an unforgettable event. For weddings, you want the cake to be the centerpiece of the event and bring all the design elements of your wedding together. The best cake studios will offer top quality and the best ingredients and designs. Cakes of this quality can take a long time, so always order as soon as possible in your event schedule. Whether you want desserts for a birthday party or a wedding cake that can serve three hundred people, always choose the best studios that offer reasonable fees and personalized experiences.


Friday, September 11, 2015

Know More About Dessert #CakesAndDecors


Know More About Dessert #CakesAndDecors

Dessert is a typically sweet course that concludes an evening meal. The course usually consists of sweet foods, but may include other items.

In world cultures there are a wide variety of desserts including cakes, tarts, cookies, biscuits, gelatins, pastries, ice creams, pies, puddings, custards, sweet soups and candies. Fruit is also commonly found in dessert courses because of its naturally occurring sweetness. Many different cultures have their own variations of similar desserts around the world, such as in Russia, where many breakfast foods such as blint, oladi, and syrniki can be served with honey and jam to make them popular as desserts. The loosely defined course called dessert can apply to many foods.

The word "dessert" originated from the French word desservir "to clean the table" and the negative of the Latin word servire. The word dessert is most commonly used for this course in the United States, Canada, Australia, New Zealand the United Kingdom and Ireland, while "sweets" or "afters" or, informally, "pudding" are alternative terms that may also be used in the United Kingdom and some other Commonwealth countries, including Hong Kong, and India.

History

Desserts were first made using natural ingredients that were locally available.In ancient civilizations people enjoyed dried fruits, honeycomb, or nuts. These were considered the first candies. When sugar began to be manufactured in the Middle Ages more sweet desserts became available. Even then sugar was so expensive usually only the wealthy could indulge on special occasions. Ice cream can be dated back to 3000BC and may be considered to be an early "dessert" in the modern sense of the word.

The first apple pie recipe was printed in 1381. Also in 1740 the first cupcake recipes were recorded. Ice cream was a Chinese invention although Marco Polo expanded the technique to Europe in his travels. By the 1800s, recipes for how to make ice cream were very popular. Vanilla also plays a large role in many desserts including ice cream. Vanilla was mostly grown in Mexico where they discovered if the vanilla pod was picked and dried then vanillin was produced which can be sweetened into a dessert on its own.

Desserts are constantly changing with the new techniques and ingredients available at the time or in the local area. They have changed from natural candies and nuts to complex souffles and multi-layered cakes. The ingredients available affect the range of desserts that can be made in each region. The first desserts required minimal effort or preparation since ancient cultures were more focused on the nutrition in foods in order to survive. Now, however, modern day cultures have more options in the desserts available.

Ice Cream went from being a shaved ice substance with flavoring to the dairy based, sweet treat modern children crave. Desserts also went through a major change in manufacturing. The Industrial Revolution in America and Europe changed desserts (and food in general) because they began to be mass-produced, processed, preserved, canned, and packaged. The iconic foods soon became a staple in many households because of their availability. Frozen foods became very popular starting in the 1920s when freezing emerged.

Also around the 1920s lunch counters and fast food restaurants were established with increasing popularity. These processed foods became a huge part of diets in many industrialized nations. Food has always varied with each culture and area, and, despite the boom in mass-produced processed desserts, they have still represented regional and ethnic cultures. Many countries have desserts and foods distinctive to their nations or region. One example of this is the churro historically from Spain. These sticks of dough are now deep fried. They are available all throughout North and South America along with many other areas. They started with Spanish shepherds as a substitute for bread. Now they have been passed through generations and cultures and changed to a sweet confection different for each culture.

Spices can vary the taste of desserts and add flavor.Desserts usually contain sugar or a sweetening agent. Desserts contain a range of ingredients which makes the end product differ. Some of the more common ingredients in desserts are flour, dairy, eggs, and spices. Sugar gives many desserts their "addictive sweetness" and contributes to their moisture and tenderness. The flour or starch component in most desserts serves as a protein and gives the dessert structure.

Different flours such as All-Purpose Flour or Pastry Flour provide a less rigid gluten network and therefore a different texture. Flour desserts may also contain dairy products. Different desserts use flour to various degrees. Desserts like ice cream and puddings have some form of dairy as their main ingredient, whereas desserts like cakes and cookies have relatively small amounts. The dairy products in baked goods keep the desserts moist. Many desserts also contain eggs, in order to form custard or to aid in the rising and thickening of a cake-like substance. Egg yolks specifically contribute to the richness of desserts. Egg whites can act as a leavening agent when the proteins uncoil and expand. Desserts can contain many different spices and extracts to add a variety of flavors. One example of this is salt. Salt is added to desserts to balance sweet flavors and create a contrast in flavors. All these ingredients contribute to desserts and make them different.

Dessert can come in variations of flavors, textures, and looks. Desserts can be defined as a usually sweeter course that concludes a meal.[2] This definition includes a range of courses anywhere from fruits or dried nuts to multi-ingredient cakes and pies. With the many different varieties of desserts the many cultures have different variations. In modern times the variations of desserts have usually been passed down or come from geographical regions. This is one cause for the variation of desserts. These are some major categories in which desserts can be placed.

Cakes- Cakes are sweet tender breads made with sugar and delicate flour. Cakes can vary from light, airy sponge cakes to dense cakes with less flour. In addition, small-sized cakes have become popular in the form of cupcakes and petits fours.

Chocolates and candies- Many candies involve the crystallization of sugar which varies the texture of sugar crystals. Candies can be found in many different forms including caramel, marshmallows, and taffy.

Cookies- Cookies are similar to cakes (the word coming from the Dutch word koekje meaning little cake). Historically cookies were small spoonfuls of cake batter placed in the oven to test the temperature. Cookies can come in many different forms. Examples include layered bars, crispy meringues, and soft chocolate chip cookies.

Custards and puddings- These kinds of sweets usually include a thickened dairy base. Custards are cooked and thickened with eggs. Baked custards can include crme br»l©e and flan. Puddings are thickened with starches.

Donuts-Donuts are a sweet that can be considered a breakfast or dessert. It is considered a deep fried dessert made from flour. It is the shape of a circle, and sometimes has a hole in the center. There are two-types of donuts: ring-shaped with the circle in the middle, and filled. A filled donut differs from a ring-shaped donut as it is often filled with fruit preserves, cream, custard or other sweet fillings. Square-shaped donuts are commonly referred to as fritters.Fritters are fried and consist of batter or breading that is often filled with fruit, or other ingredients. Fritters are made up of eggs, milk, batter, deep or pan-fried, wheat flour, cornmeal, or a mix of two can make the batter. Donuts can be homemade or found at bakeries, grocery stores, and speciality outlets.


Monday, July 20, 2015

Now You can Enjoy Dairy Queen Cakes for Take Out! #BloggersSocialMediaOpinion


Now You can Enjoy Dairy Queen Cakes for Take Out! #BloggersSocialMediaOpinion #CakeMeHome #DairyQueen #DQCakes

A cool treat enjoyed at home with your family and friends in this scorching city heat is sure welcome indeed, and who doesn’t want an ice cream cake from Dairy Queen?

Cake Me Home is DQ’s response to the millions of requests by Filipino ice cream lovers for packaging to be able to carry the delicious Blizzard and DQ Ice Cream Cakes home.


And it’s so simple, you will never have problems bringing DQ cakes ever again. When you decide to take a cake home, you will get a lightweight ice box and course, ice packs, plus a reusable Eco bag.

Experience Dairy Queen Ice Cream cakes and enjoy them the comforts of your own home with DQ’s Cake Me Home.


Follow Dairy Queen Philippines on social media, dairyqueenphilippines Facebook and don’t forget to use our hashtags #CakeMeHome #DairyQueen #DQCakes


Friday, June 19, 2015

Creamy Buttercake #CakesAndDecors


Creamy Buttercake


Ingredients:

Cake

1 cup butter, cubed at room temperature
2 cups granulated sugar
4 eggs
1 tablespoon vanilla
3 cups all purpose flour
1 teaspoon kosher salt
1 teaspoon baking powder
½ teaspoon baking soda
1 cup buttermilk

Butter Glaze

⅓ cup butter
¾ cup granulated sugar
2 tablespoons water
2 teaspoons vanilla

Procedures:

(1) Preheat the oven to 325°F/165°C

(2) Grease a 10" bundt pan with butter or shortening very liberally. Dust the pan with flour and set aside.

(3) Place all the cake ingredients in the bowl of your stand mixer fitted with the paddle attachment. Mix on low for 30 seconds and then increase the speed to medium and mix for 3 minutes.

(4) Pour the batter into the prepared pan and bake for 65-75 minutes until a toothpick entered into the center comes out clean.

(5) When the cake is done make the glaze. Combine all ingredients into a small saucepan over medium-low heat. Stir continuously until the butter is melted and the sugar is dissolved. Do not bring to a boil.

(6) Poke holes all over the warm cake using a knife and pour the glaze evenly on the cake while still in the pan.

(7) Allow the cake to cool completely in the pan and then invert the cake onto a serving plate.
I actually like to make this cake a day in advance, finding it to be more moist and flavorful when it rests overnight.


Saturday, June 13, 2015

Time Tested Ways to Learn Cake Decorating Techniques Using Fast and Easy Methods #CakesAndDecors


Time Tested Ways to Learn Cake Decorating Techniques Using Fast and Easy Methods #CakesAndDecors


If you want to learn cake decorating techniques, you'll be glad to know that the internet is filled with them! Whether you're brand new to cake decorating or simply wish to improve your skills, you can learn everything from basic techniques to more advanced ones at home on your computer.

Whether you are a novice to cake decorating or simply want to improve upon your skills, you can learn everything from basic techniques to more advanced ones on your own home computer. Online courses are the way to go because they allow you to learn at your own pace and practice techniques over and over again. Plus, they cost a LOT less than onsite classes! When you are trying to learn a new technique, do not allow yourself to become discouraged. Even if you make an enormous mess, do not give up. Keep practicing until you learn your new skills.


There are a few easy things you can do to make cake decorating techniques easier to master. For example, you must make sure you?re using the right pastry bag. You should not use large bags because they can be awkward to handle. When beginning, smaller ones will make adding color and writing a lot simpler.

Using the smaller pastry bags will also help to prevent you from wasting a lot of icing. The larger ones may be useful later on but you only need to practice the techniques---not perfect them! Practice makes perfect after all.

One more thing you can do to make sure that your practicing goes well is to learn to cut the pastry bag the right way. It must be cut so that it fits the coupler perfectly. Do not forget that the bigger end of the coupler faces up towards the tip of the bag. Position it down inside and then slice the end of the pastry bag so that the smaller end of the coupler sticks out a little bit.

It might take a few tries before you master how to prepare the pastry bag and coupler precisely, but once you get the used to it, it will make learning cake decorating techniques A TON easier! Cake decorating instructions can call for thin, medium, or thick consistency icing. As a novice, you might find assessing the correct consistency to be quite confusing, but you will catch on soon enough.

Whether you want to learn basic cake decorating techniques or more advanced, intricate ones, you need to accept the fact that you probably won?t learn everything in just one night. You may find yourself talented at one style but not so much with another style. Just take your time, don?t get discouraged, and good luck!

Learning cake decorating techniques does not have to be frustrating! Here's a tip: Get a comprehensive online class, take it in the privacy of your own house and then make a fabulous cake for your extended family. They are going to be STUNNED when they see what you can do! Hey, you can even turn it into your new house business and make extra cash each month!


Source: Maria Campbell@cakedecoratinglesson

Monday, November 24, 2014

How to Make Filipino Cheesecake #CakesAndDecors


How to Make Filipino Cheesecake #CakesAndDecors

This is awesome cheesecake recipe wherein you could choose your ideal Filipino toppings like tropical fruits, jams or according to your choice.

Ingredients:

For the Crust
12 graham crackers
6 tablespoons butter, melted; plus more, room temperature, for pan
2 tablespoons sugar
2 tablespoons Cocoa powder
pinch of salt

For the Cake
3 1/2 pounds (seven 8-ounce packages) cream cheese, room temperature
2 1/4 cups sugar
1/2 cup all-purpose flour
1 cup sour cream, room temperature
1 1/2 teaspoons pure vanilla extract
5 large eggs, room temperature

Procedures:

1. Preheat the oven to 350 degrees. Butter the sides of a 10-inch spring-form pan. Wrap exterior of pan (including base) in a double layer of foil.

2. To make the crust, process graham crackers in food processor until fine. Combine graham cracker crumbs, butter, sugar, cocoa powder and salt in a medium bowl. Transfer mixture to the pan and pat into an even layer using the bottom of a measuring cup or meat pounder. Freeze the dough in the pan, about 15 minutes. Place pan on a baking sheet. Bake until the crust is firm to the touch and deeply golden brown, about 15 minutes. Transfer pan to a wire rack to cool completely.

3. In the bowl of an electric mixer fitted with the paddle attachment, beat the cream cheese on medium speed until fluffy, about 3 minutes, scraping down sides as needed.

4. In a large bowl, whisk together sugar and flour. With mixer on low speed, gradually add sugar mixture to cream cheese; mix until smooth. Add sour cream and vanilla; mix until smooth. Add eggs, one at a time, beating until just combined; do not over mix.

5. Pour cream cheese filling into the prepared pan. Set pan inside a large, shallow roasting pan. Carefully ladle boiling water into roasting pan to reach halfway up sides of spring-form pan.

6. Bake 45 minutes; reduce oven temperature to 325 degrees. Continue baking until cake is set but still slightly wobbly in the center, about 30 minutes more. Turn off oven; leave cake in oven with the door slightly ajar, about 1 hour. Transfer pan to a wire rack; let cake cool completely.

7. Refrigerate, uncovered, at least 6 hours or overnight. Before unmolding, run a knife around the edge of the cake.


Thursday, June 12, 2014

Tasty Yellow Cake Recipe #CakesAndDecors


Ingredients:

300 grams cake flour (about 3 cups)
¾ cup butter, softened
1⅔ cups sugar
2 eggs
1½ tsp vanilla extract
1⅓ cups milk
1 Tbsp baking powder
½ tsp salt

Pocedures:

1. Preheat your oven to 350°F.

2. Butter and flour two 9-inch cake pans. It can help to line the bottom with a circle of parchment paper cut to fit the pan.

3. In a large mixing bowl, stir together the flour, baking powder and salt until everything is blended.

4. In the bowl of a stand mixer fitted with the paddle attachment, combine the eggs, butter, sugar and vanilla. Beat on medium speed until fluffy.

5. Now add some of the dry ingredients to the egg-sugar mixture while the machine is running. When it's fully incorporated, add some of the milk. Continue alternating adding the dry ingredients with the milk until it's all incorporated and the batter is smooth, scraping down the side of the bowl as you go. Then pour the batter into your prepared pans and transfer them to the oven.

6. Bake for about 30 minutes or until a toothpick inserted into the center comes out clean, or with a crumb or two attached. You can start testing after 28 minutes, because it's better to check too soon than to over-baked.

7. Cool the cakes for 10 minutes in the pans on a wire rack, then loosen the edges by running a knife along the sides, turn the cakes out onto the racks and cool for at least another hour, and frost with this chocolate frosting recipe or as desired.

8. Makes two 9-inch layers


Lover's Cheesecake Recipe #CakesAndDecors


The result is a creamy cheesecake baked for perfection.

Ingredients:

For the crust:
• 10 graham crackers
• 1 Tbsp sugar
• 6 Tbsp (3/4 stick) butter

For the filling:
• 2½ pounds cream cheese (5 packs)
• 1½ cups sugar
• ½ cup sour cream
• 6 whole eggs plus 2 egg yolks
• 1 Tbsp lemon juice
• 2 tsp vanilla extract
• pinch salt

Procedures:

Prepare the graham cracker crust:

1. Preheat oven to 325°F.

2. Break up the graham crackers and pulse them in a food processor until you have fine crumbs. While you do this you can be melting the butter in a small saucepan over low heat (or just melt it in the microwave).

3. Transfer the crumbs to a mixing bowl and stir in the sugar.

4. Finally, stir in the melted butter and combine until the crumbs are uniformly moistened.

5. Press the crumbs into the bottom of a 9-inch spring-form pan until you have an even layer.

6. Bake for ten minutes, then remove the pan from the oven and let the crust cool while you do the next steps.

Prepare the cheesecake:

1. Preheat oven to 500°F.

2. Cut the cream cheese into cubes and let it sit at room temperature for about 20 minutes to soften.

3. Transfer the softened cream cheese to the bowl of a stand mixer. Beat it on medium speed with the paddle attachment for about two minutes.

4. Scrape the sides of the bowl with a rubber spatula, then add the sugar, salt lemon juice, vanilla and sour cream and beat for another two minutes.

5. Scrape the bowl again, then add the eggs and egg yolks and beat until everything is completely blended and the mixture is smooth and fluffy, another couple of minutes. You may need to stop the mixer to scrape the bowl every now and then.

6. Fill a roasting pan half full of water and set it on the lower rack of your oven. Seal the bottom of the spring-form pan with foil and set it on a baking pan.

7. Now pour the filling into the spring-form pan and transfer the baking pan (with the cheesecake on it) to the upper rack in the oven.

8. Bake at 500°F for 10 minutes, then lower the heat to 200°F and bake for another 1½ hours. Don't open the oven door! When it's finished, the cheesecake should jiggle a little bit at the center but be firm at the edges.

9. Transfer the cheesecake to a wire rack, and after cooling for 15 minutes, carefully loosen the edges of the cake with a knife.

10. Let the cheesecake cool for a full three hours at room temperature, then cover with plastic wrap and refrigerate at least overnight, although a full 24 hours is best.


Sunday, March 16, 2014

Easy Step-by-Step Procedures in Making Classic Tiramisu Cake.#CakesAndDecors


Easy step-by-step procedures in making Classic Tiramisu Cake.

Let’s talk about Tiramisu.

A good Tiramisu cake is an extraordinary lascivious dessert that is perfect for almost every occasion.

Tiramisu is one the most popular Italian cakes and people around the world considered this dessert that comes from heaven. I will describe on how to make this cake in easy terms. Some people were confused for the origin of this layered dessert. Around the world, people were trying to make their own and substituted some of the ingredients, maybe because of the availability in the market or their passion to create a different one. I consider this dessert as one of my favorite.

Classic tiramisu is a layered dessert consisting of alternating layers of coffee-soaked biscuits, creamy mascarpone cheese and a flan covered by unsweetened cocoa powder for garnishing.


Here are the ingredients and procedures of three-layered tiramisu:

There are two (2) major advanced preparations you have to make before starting to assemble. This is a must that you have to observe always and care must be applied.

1.) Flan mixture or egg mixture

2.) Whipped cream mixture

And, make espresso, or brewed coffee or ordinary coffee (extra-strong). You can add rum or brandy but it’s optional. Remember to make an extra amount of coffee mixture to avoid shortage. Set aside to cool.

Ingredients and procedure to make a flan: (Egg Mixture)

5 – 6 pieces egg yolks

1 – 2 cups of milk (fresh milk)

½ cup refined white sugar

1 tablespoon vanilla extract

Procedures:

1.) Beat eggs, milk and sugar in a two-quart saucepan until sugar is dissolved.

2.) Add vanilla extract while beating eggs and sugar.

3.) Transfer the mixture in another container, to be cooked in steamer under medium heat. Stir constantly to avoid burnt mixture. It must be in “gel consistency” or thick not liquid.

4.) Set aside the mixture, cover and refrigerate. (A must to refrigerate for 20 – 30 minutes).

5.) Mix the cold egg mixture with mascarpone cheese or cream cheese with grated white chocolate. Set aside.

Ingredients and procedure to make a creamy cheese: (Cheese Mixture)

500 grams Mascarpone cheese (if not available, use 16 ounces cream cheese) or 8 ounces cream cheese plus 8 ounces Ricotta cheese)

75 grams Semi-sweet white chocolate bars or more

500 – 700 grams Thick Whipping Cream

Procedures:

1.) Beat whipping cream and grated semi-sweet white chocolate in chilled bowl until stiff. Add grated white chocolate more if needed. The result must thick in consistency.

2.) Cover and refrigerate. (A must to refrigerate for 20 – 30 minutes

Prepare the round spring form pan by wrapping the ring and bottom of the pan with aluminum foil. Always put the round hard board at the bottom of the pan for support.

Now, we have to assemble the prepared mixture into the spring form pan.

Ingredients and procedures in layering in making Tiramisu:

30 pieces or more lady fingers biscuits or any pastry biscuits like lady fingers.

Procedures:

1) Brush the lady fingers one by one with coffee mixture or espresso and arrange in the spring form pan (single layer only). Do not over-soaked before putting unto the pan.

2) Use disposable glove while putting or layering the egg mixture into the arranged lady fingers in the pan. Use only a required amount of this mixture. Reserved for another layer. Be sure to layer the lady fingers thoroughly to avoid hollow portion. Flatten each layer by slightly pushing downward.

3) Next, layer the cheese mixture, the same as in the egg mixture. Same amount and procedures.

4) Sprinkle generous amount of unsweetened cocoa at the top. (optional)

5) Again, layer the lady fingers biscuits, brushed with espresso or coffee mixture. Do not brush the coffee mixture directly unto the arranged lady fingers. It must be brushed first before layering in the pan. Same procedure as above.

6) Again, layer the cheese mixture, (same procedure as above) up to the rim of the spring form pan.

7) Sprinkle generous amount of unsweetened cocoa powder all over the cake, then topped with coarse-grated dark chocolate.

8) Chilled, cover and refrigerate overnight to get the best result.

9) Makes 8 slices.

Note: If cheese mixture is too liquid, add enough grated white chocolate or crush lady finger biscuits.


Tuesday, February 11, 2014

Lady in Red Cake #CakesAndDecors


Lady in Red Cake is a striking red cake with cream cheese frosting.


Ingredients:

• 250 grams cake flour (about 2½ cups)
• 3 Tbsp cocoa powder
• ½ tsp salt
• 1½ cups sugar
• 2 eggs
• 1½ cups vegetable oil
• ¼ cup red food coloring
• 1 tsp vanilla extract
• 1 cup buttermilk
• 1 Tbsp white vinegar or cider vinegar
• 1½ tsp baking soda

Procedures:

1. Preheat your oven to 350°F.

2. Butter and flour two 9-inch cake pans. It can help to line the bottom with a circle of parchment paper cut to fit the pan.

3. In a large mixing bowl, stir together the flour, cocoa and salt until blended.

4. In the bowl of a stand mixer fitted with the paddle attachment, combine the eggs, oil, sugar, vanilla and red food coloring. Beat on medium speed until fluffy.

5. Now add some of the dry ingredients to the egg-sugar mixture while the machine is running. When it's fully incorporated, add some of the buttermilk. Continue alternating adding the dry ingredients with the buttermilk until it's all incorporated and the batter is smooth, scraping down the side of the bowl as you go.

6. In a small bowl, mix together the vinegar and baking soda, and when it foams, mix it into your batter. You're going to want to move quickly, though. Mix it in just until it's combined, about ten seconds. Then pour the batter into your prepared pans and transfer them to the oven.

7. Bake for about 30 minutes or until a toothpick inserted into the center comes out clean, or with a crumb or two attached. You can start testing after 28 minutes, because it's better to check too soon than to overbaked.

8. Cool the cakes for 10 minutes in the pans on a wire rack, then loosen the edges by running a knife along the sides, turn the cakes out onto the racks and cool for at least another hour, and then refrigerate (wrapped in plastic) for at least an hour before frosting with this cream cheese frosting.

9. Makes two 9-inch layers.


Rich Chocolate Frosting #CakesAndDecors


Rich Chocolate Frosting


You really can frost with whatever is your preference: icing, ganache, buttercream, and so forth. A winning recipe with great texture and flavor especially for cakes and cookies.

Ingredients:

• 1/2 cup butter
• 2/3 cup cocoa
• 4-1/2 cups powdered sugar
• 1/3-1/2 cup half and half
• 1 tsp. vanilla extract
• pinch salt


Procedures:

(1) In large saucepan, melt together butter and cocoa. Stir until smooth. Using mixer, alternately beat in powdered sugar and milk until frosting is smooth and creamy.

(2) Stir in vanilla and salt. Fills and frosts two 9" cake layers.

(3) Yield: 2-1/2 cups


Friday, January 10, 2014

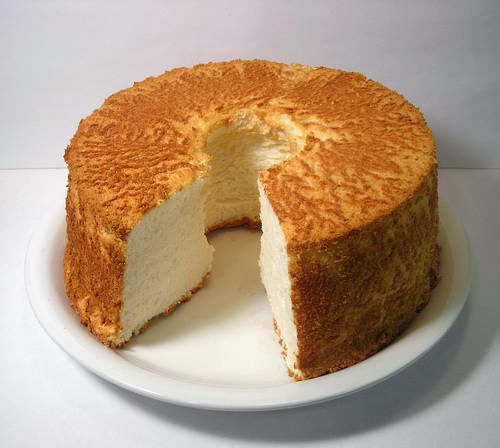
Angel Food Cake #CakesAndDecors


Angel Food Cake


Ingredients:

1 ¼ cups all-purpose flour
1 ½ cups, sugar
1 ½ cups egg whites (about 12 to 15 egg whites)
1 ½ tsp cream of tartar
¼ tsp salt
1 ½ tsp vanilla or ½ tsp almond extract

Procedures:

1) Mix flour and ½ cup sugar in small bowl. Set aside.

2) Place egg whites in mixer bowl. Attach bowl and wire whip to mixer.

3) Gradually turn to speed 6 and whip until egg whites are frothy, 30 to 60 seconds.

4) Add cream of tartar, salt and vanilla. Turn to speed 8 and whip until whites are almost stiff but not dry, 2 to 2 ½ minutes. Turn to speed 2. Gradually add remaining 1 cup sugar and mix about 1 minute. Stop and scrape bowl. Remove bowl from mixer. Spoon flour-sugar mixture, ¼ at a time, over egg whites. Fold in gently with spatula, just until blended.

5) Pour batter into ungreased 10-inch tube pan. With knife, gently cut through batter to break up large air bubbles. Bake at 375F until crust is golden brown and cracks are very dry, about 35 minutes. Immediately invert cake pan onto funnel or soft drink bottle. Cool completely. Remove from pan.

6) Yield 16 servings.


Bread Making Tips: KitchenAid Stand Mixer #CakesAndDecors


Bread Making Tips

Making bread with a mixer is quite different from making bread by hand. Therefore, it will take some practice before you are completely comfortable with the new process. We recommend you start with an easy recipe. Like Basic White Bread until you become accustomed to making bread with stand mixer.

Tips for Mixing and Kneading:

1) Always use the dough hook to mix and knead yeast doughs.

2) Never exceed speed 2 when using the dough hook.

3) Never use recipes calling for more than 8 cups of all-purpose flour or 6 cups of whole wheat flour when making dough with a 4.5-quart tilt-head mixer.

4) Never use recipes calling for more than 9 cups of all-purpose flour or 6 cups of whole wheat flour when making dough with a 5-quart tilt-head mixer.

5) Most bread recipes give a range for the amount of flour to use. When the dough clings to the hook and cleans the sides of the bowl, enough flour has been added. If the dough is sticky or the humidity is high, slowly add more flour (about ½ cup at a time), but never exceed the recommended flour capacity. Knead after each addition until the flour is completely worked into the dough. If too much flour is added, a dry loaf will result.

6) Some types of dough, especially those made with whole grain flours, may not form a ball on the hook. However, as long as the hook comes in contact with the dough, kneading will be accomplished.

7) Some large recipes and soft doughs may occasionally climb over the collar of the hook. This usually indicates that the dough is sticky and more flour should be added. The sooner all the flour is added, the less likely the dough will climb the hook. For such recipes, try starting with all but the last cup of flour in the initial mixing process. Then add the remaining flour as quickly as possible.

8) Use a candy or other kitchen thermometer to assure that liquids are at the temperature specified in the recipe. Liquids at higher temperature can kill the yeast, while liquids at lower temperatures will retard yeast growth.

9) Warm all ingredients to room temperature to insure the proper rising of dough. If the yeast is to be dissolved in the bowl, always warm the bowl first by rinsing with warm water to prevent cooling of liquids.